

DNS Record Setup for Zoho Mail
Zoho Mail is one of the most popular solutions for creating email addresses for your own domain, and it even has a free plan.
To register Zoho Mail, you need to link your domain to the service. You should specify your domain name here (this link is for the free plan, but you can also choose a paid plan).
To connect your domain, you will need to complete two main steps:
- Verify that you are the domain owner;
- Set up MX records.
Verifying Domain Ownership with a CNAME Record
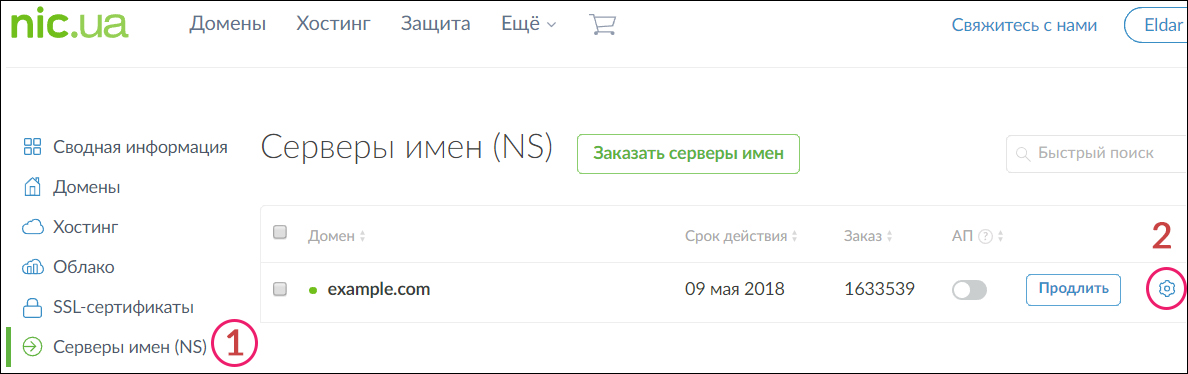
- Log into your account on NIC.UA;
- Select the Name Servers (NS) section;
- Choose the required domain from the list and click on the gear icon;
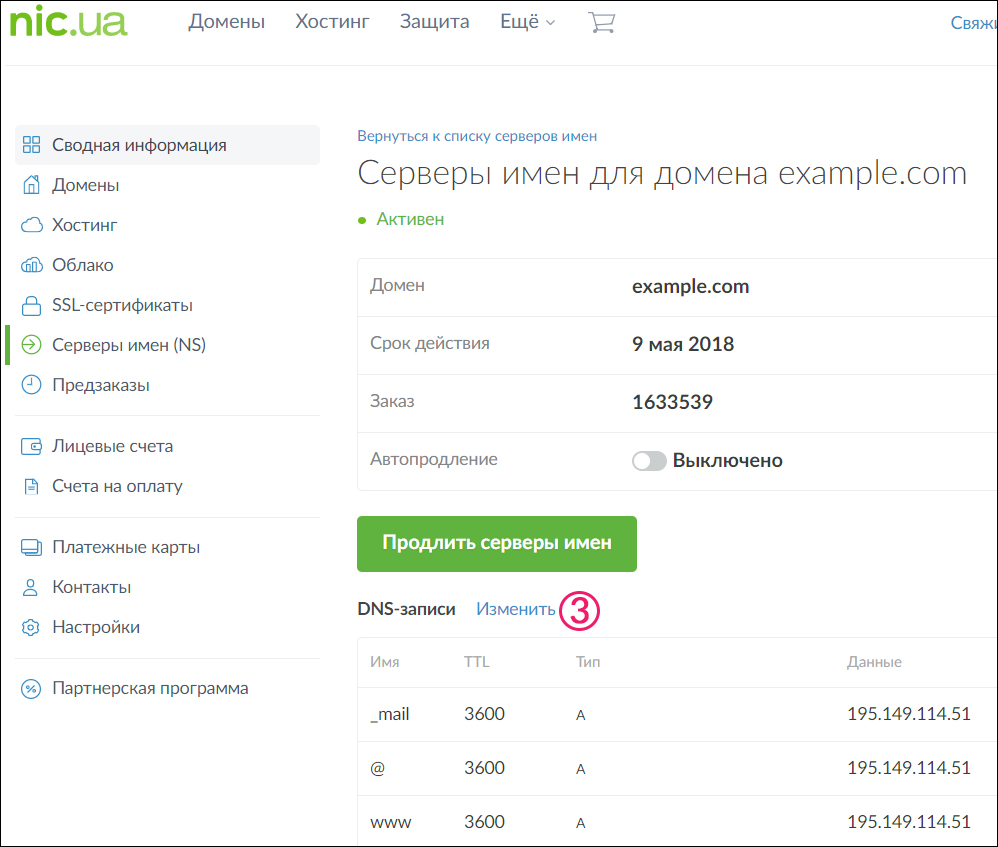
- A page with DNS records for the domain will open, and you will need to click the "Edit" button;
Choose Your Dream Domain Name
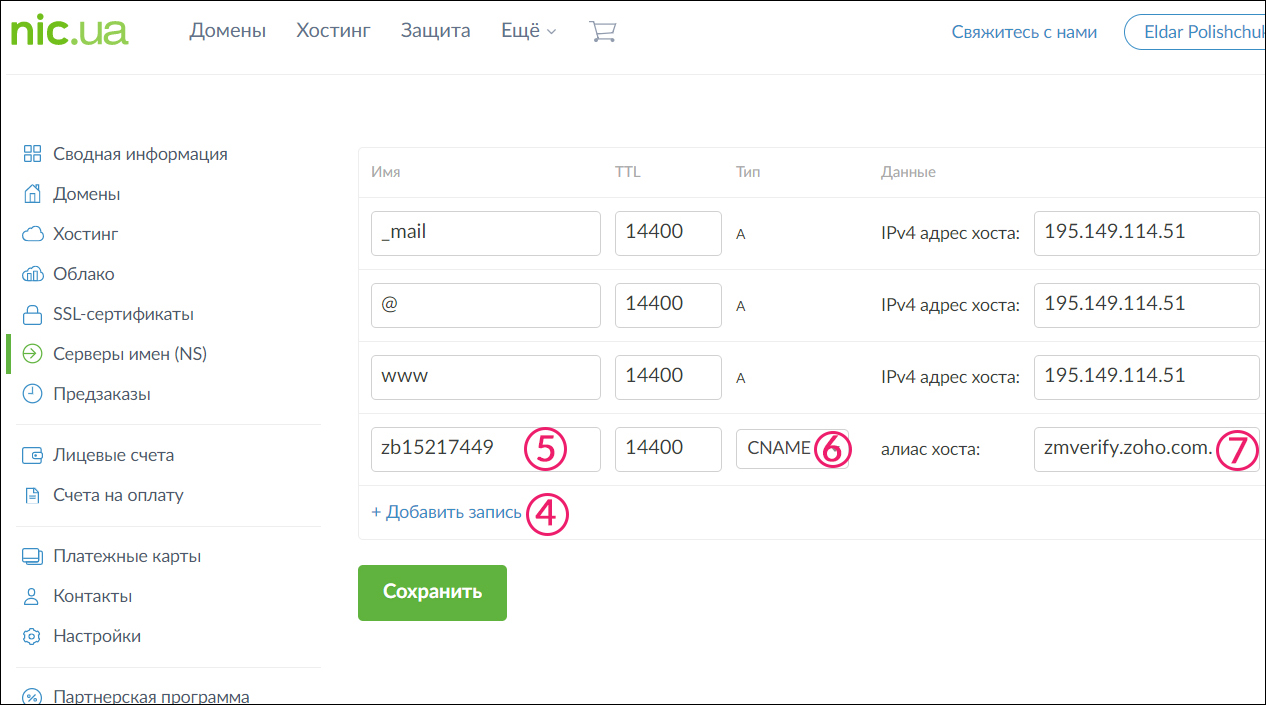
- Add a CNAME record:
- Click "Add Record";
- In the "Name" field, paste the subdomain name generated by the Zoho service;
- In the "Type" field, choose "CNAME";
- In the "Host Alias" field, paste the host provided by the Zoho service (make sure to add a period at the end!);
- Click the "Save" button. After some time, you will be able to verify domain ownership.
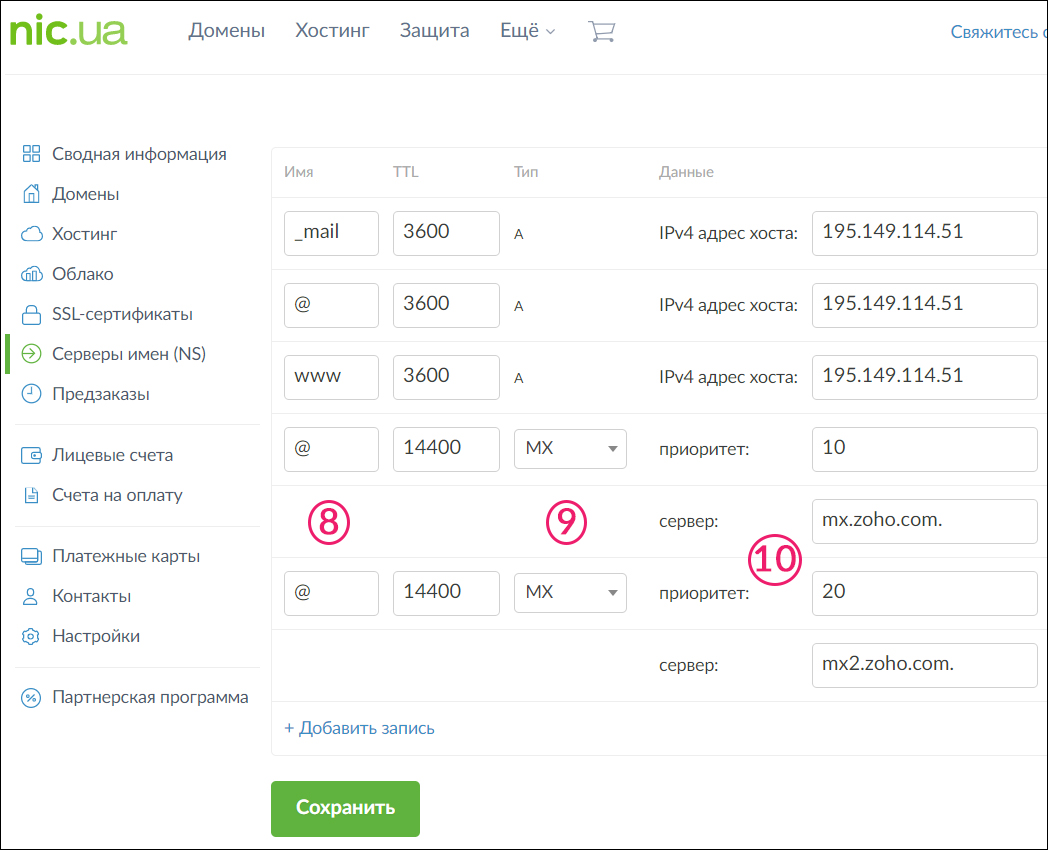
Setting up MX records After domain verification, you can proceed to add MX records. First, you need to delete all existing MX records with the "@" symbol — so that all mail will go through Zoho servers.
Add two MX records by filling out the fields as follows:
- Click "Add Record" twice;
- In the "Name" field, type the "@" symbol;
- In the "Type" field, choose "MX";
- In the "Server" field, paste the host provided by the Zoho service (make sure to add a period at the end!);
- In the "Priority" field, paste the value provided by the Zoho service;
- Click the "Save" button.