


DNS Record Setup for Blogger Service
If you created a blog on the Blogger service, you have the option to connect your own domain purchased from NIC.UA. To do this, you need to add two records to the name servers.
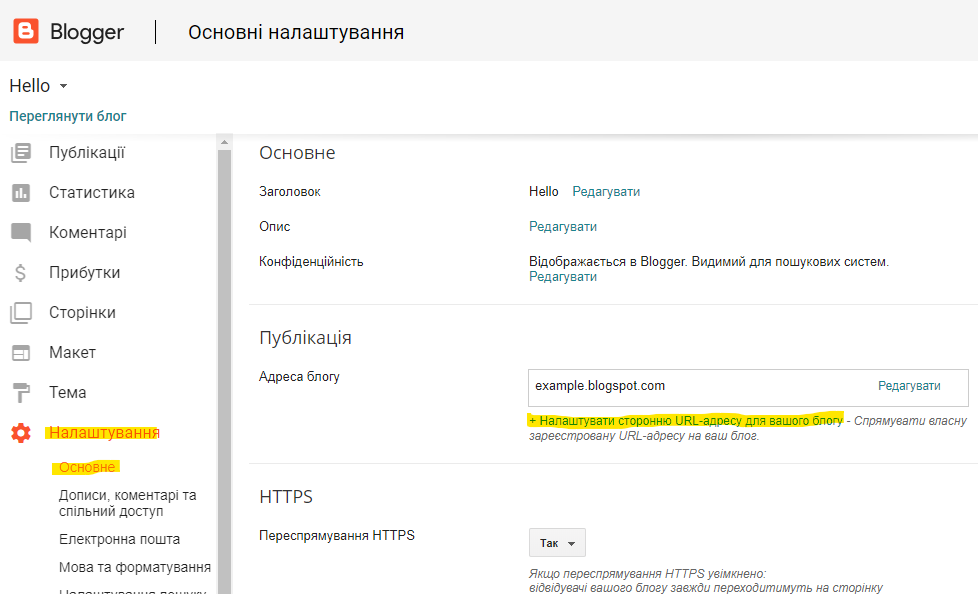
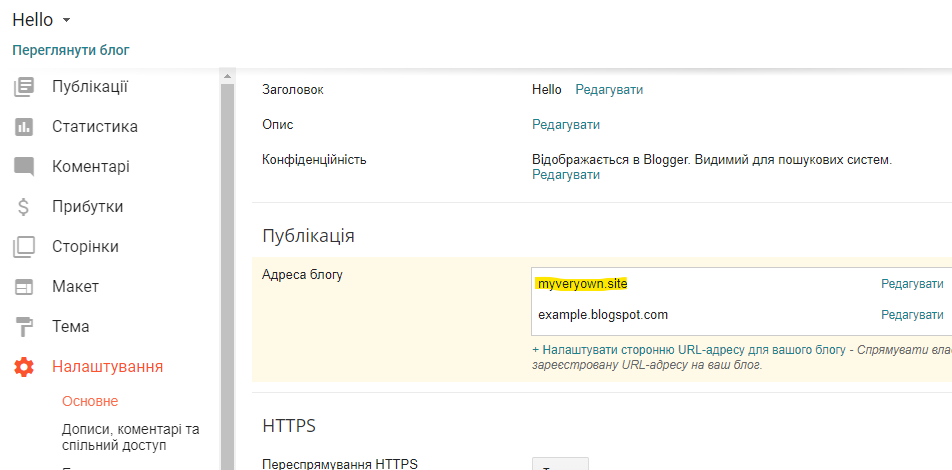
First, you need to obtain these records: log in to blogger.com with your login and open the "Settings" menu. You need the "Blog Address" section:
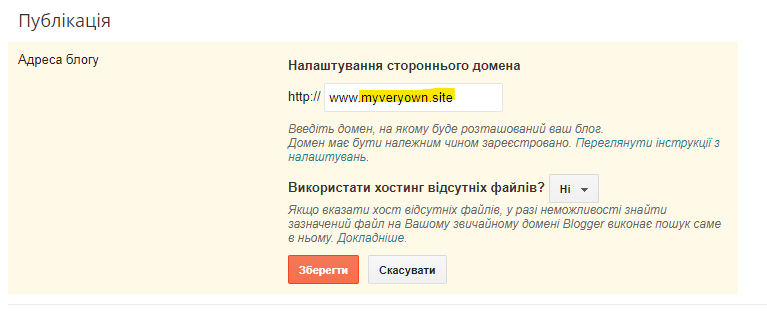
Click on the "Set up a third-party URL..." button and enter your domain name starting with "www". Then click "Save":
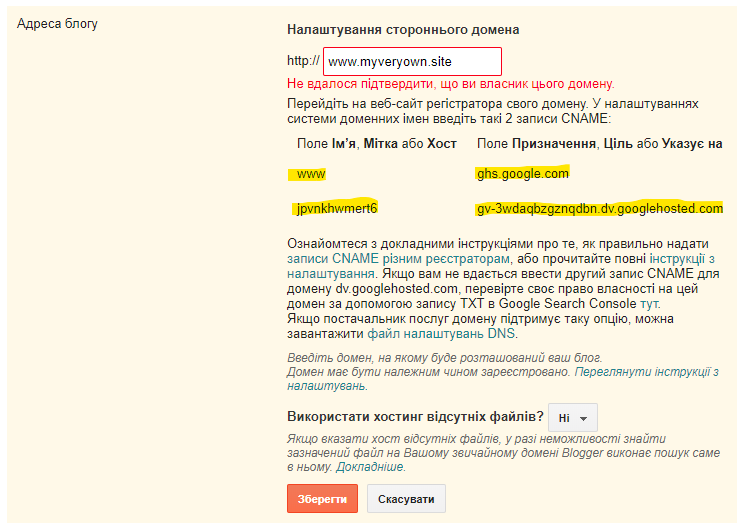
After saving, Blogger will provide a list of records that need to be added to your domain to point it to the created blog. These will be two CNAME records:
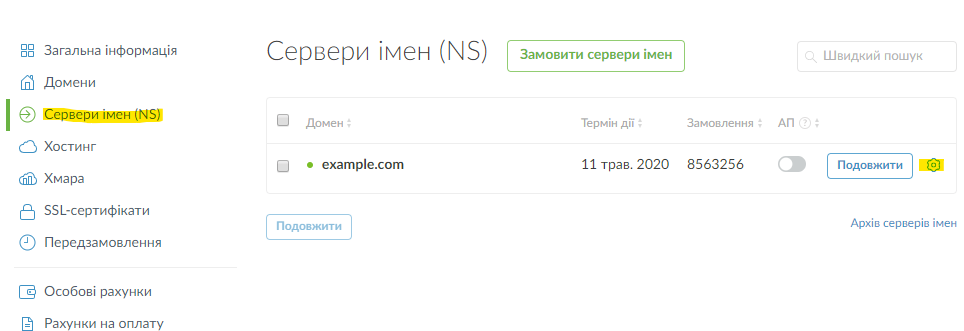
To add them, open the "Name Servers (NS)" section and go to the domain settings by clicking the gear icon next to the name servers; then click "Edit" next to the DNS records:
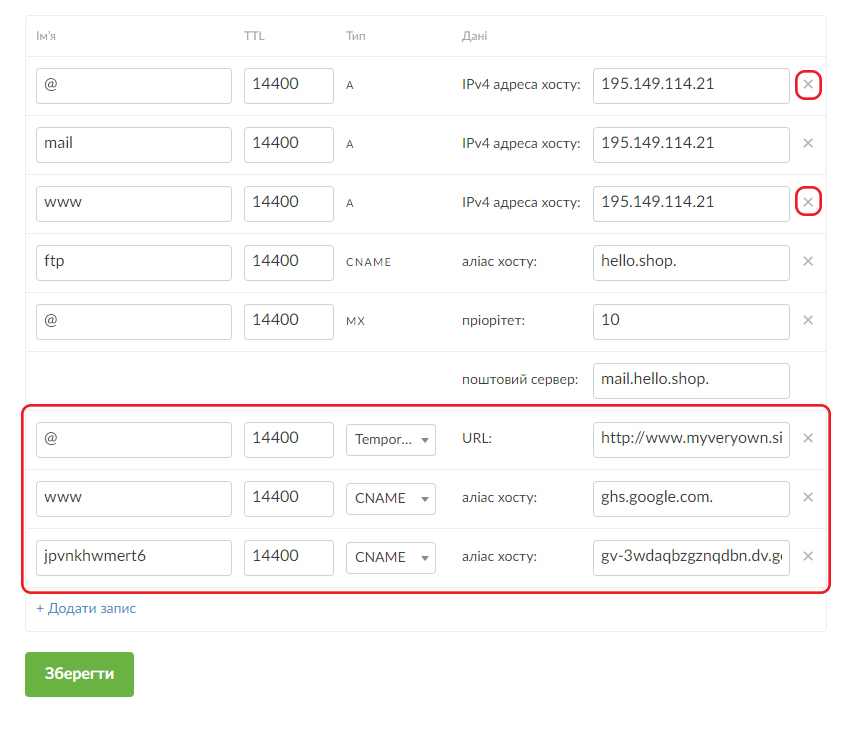
A menu will open to edit and add DNS records. You probably already have two records with the names "@" and "www" and the type "A". These need to be deleted by clicking the cross at the end of the line.
Then you need to add three records:
- Record "@"
- Name: @
- Type: Permanent Redirect
- URL: http://www.your-domain.com
- Record "www"
- Name: www
Choose Your Dream Domain Name
- Type: CNAME
- Host Alias: ghs.google.com.
- ⚠️ The period at the end is mandatory
- Record generated by the Blogger service
- Name: z6apo6ywgcv5 (for your site, the name will differ)
- Type: CNAME
- Host Alias: gv-626crye3vigmys.dv.googlehosted.com. (for your site, the host will differ)
- ⚠️ The period at the end is mandatory
Save the created records and return to the Blogger interface. In the "Blog Address" section, click the "Save" button: this will allow the service to check the correctness of the records and save your custom domain as the blog address:
If you get an error when saving, it means the records have not yet updated in Blogger's cache. Try saving the records after an hour or two.
